Pages

Tuesday, October 25, 2011

Hubby's Favorite Mac & Cheese

This is to die for...according to my husband. Many of my friends have probably tasted this since it's my fall back on dish any time there is a pot luck or event I need to bring food to. Since this is my most requested recipe and it tastes excellent with the BBQ chicken recipe I thought I would go ahead and share this one today.

Hubby's Favorite Mac & Cheese

8 oz         elbow macaroni
8oz          shredded cheddar cheese
12oz        small curd cottage cheese
8 oz         sour cream
1/4 c        grated parmesan
1/2 c        milk
               salt & pepper to taste
1 c           bread crumbs or crushed crackers
1/4 c        butter melted


Get Cooking
  1. Preheat oven to 350. Bring a large pot of lightly salted water to a boil, add pasta, and cook until done; drain.
  2. In 9x13 inch baking dish (I usually use a deep casserole dish instead), stir together macaroni, shredded Cheddar cheese, cottage cheese, sour cream, Parmesan cheese, milk, salt and pepper. In a small bowl, mix together bread crumbs and melted butter. Sprinkle topping over macaroni mixture.
  3. Bake 30 to 35 minutes, or until top is golden.

Zesty Slow Cooker Chicken BBQ

 LOVE LOVE THIS RECIPE! Very nice to have when you don't have time to think about dinner and it uses very few ingredients so it's budget friendly.

Zesty Slow Cooker Chicken BBQ

6           frozen boneless, skinless chicken breast halves
12 oz    BB-Q sauce
1/2 c     Italian dressing
1/4 c     brown sugar
2 T       Worcestershire sauce

Put chicken in slow cooker. In separate bowl, mix remaining ingredients together. Pour over chicken.

Cook on low for 6-8 hours OR on high for 3-4 hours.

Shred chicken and serve.

*chicken will generally test better if you use fresh or thawed chicken but it's still tasty with frozen.

Sunday, September 25, 2011

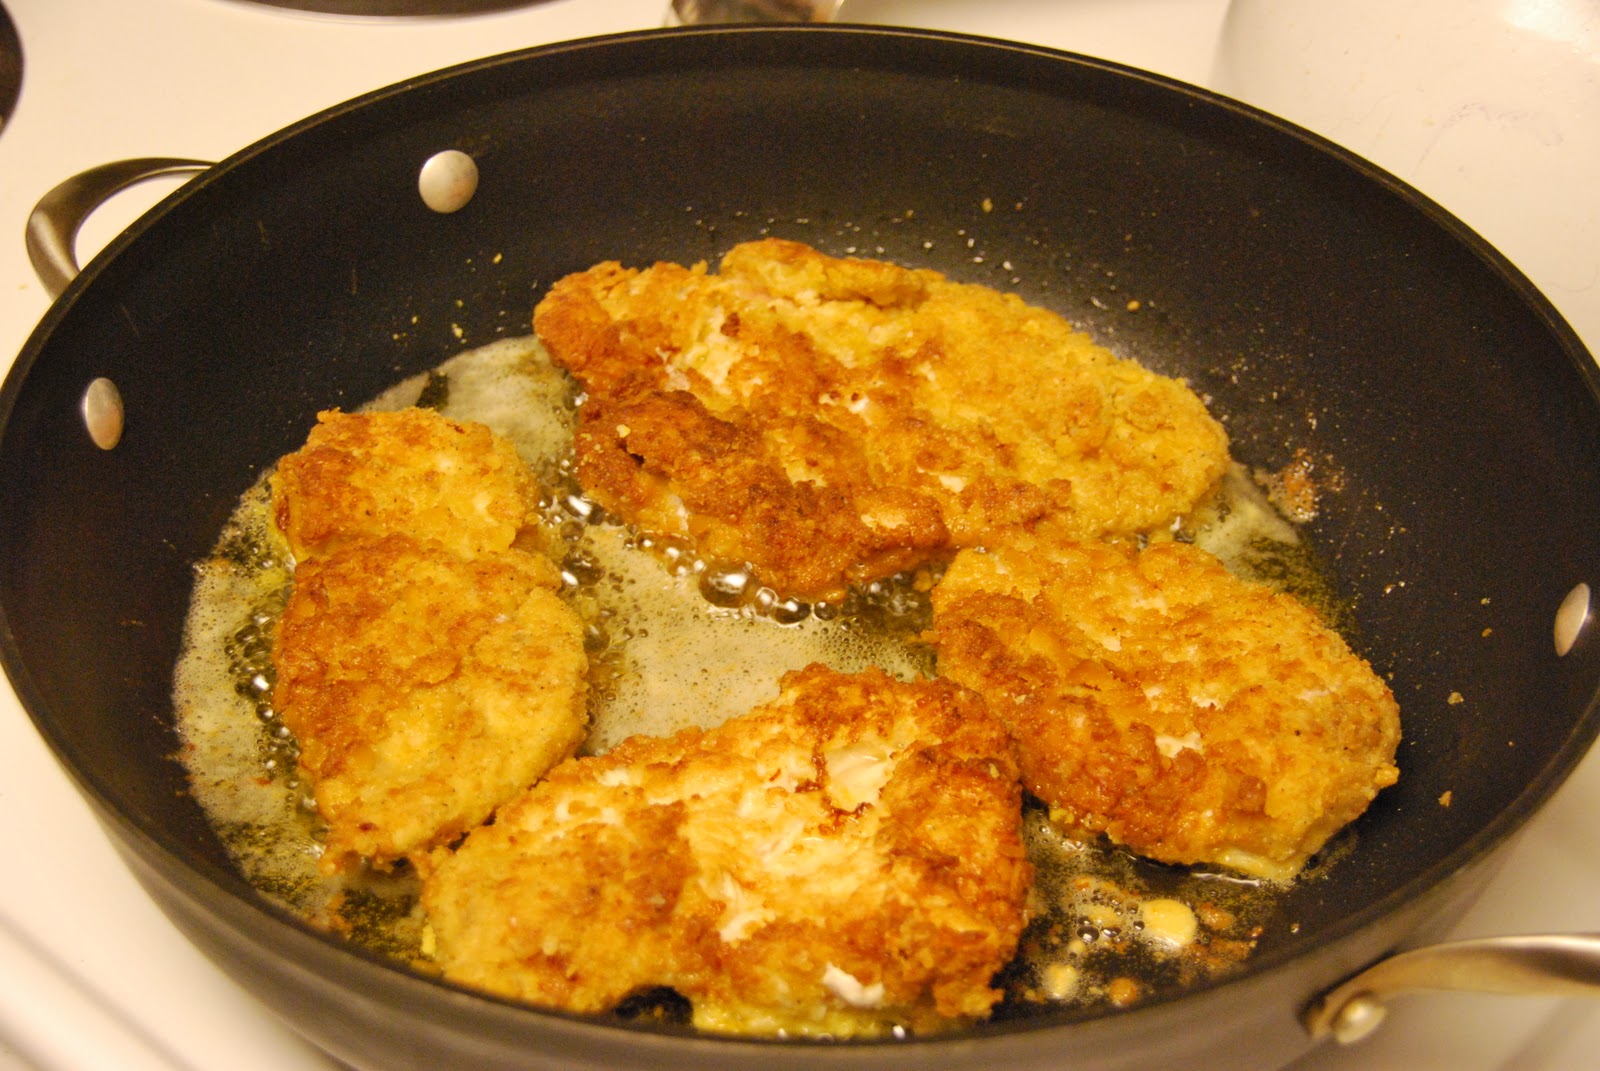
Kick'n Awesome Chicken Fried Chicken

Ingredients:

4              boneless skinless chicken boobs
30            crackers crushed
1 1/2  tsp  seasoned salt
1/2     tsp  black pepper
3        T    potato flakes
1/2     tsp  garlic powder
1               egg
2        T     flour
                 vegetable oil

Get Cooking

1. Put raw chicken in ziploc and gently pound to tenderize.

2. Coat chicken in flour

3. Dip chicken in egg

4. Put crackers, seasoned salt, pepper, garlic powder and potato flakes in a ziploc. Drop chicken in bag and shake to coat

5. Heat oil in stove top pan.

6. Add chicken and fry on one side for 5 minutes. Flip and fry on other side for 5 minutes. Flip back and forth to prevent burning and cook till done.


Gravy Recipe

Discard all but 2 tablespoons of the frying oil. Over low heat, stir in 2 1/2 tablespoons of flour. Sprinkle in seasoned salt and black pepper to taste. Stirring constantly, cook about 2 minutes. Whisk in 1 cup of chicken stock, scraping browned bits off bottom of skillet. Stir in 1 cup milk, and bring all to a boil over high heat, stirring constantly. Reduce heat to low, and simmer for about 5 minutes. Serve immediately with the chicken. 


Thursday, September 22, 2011

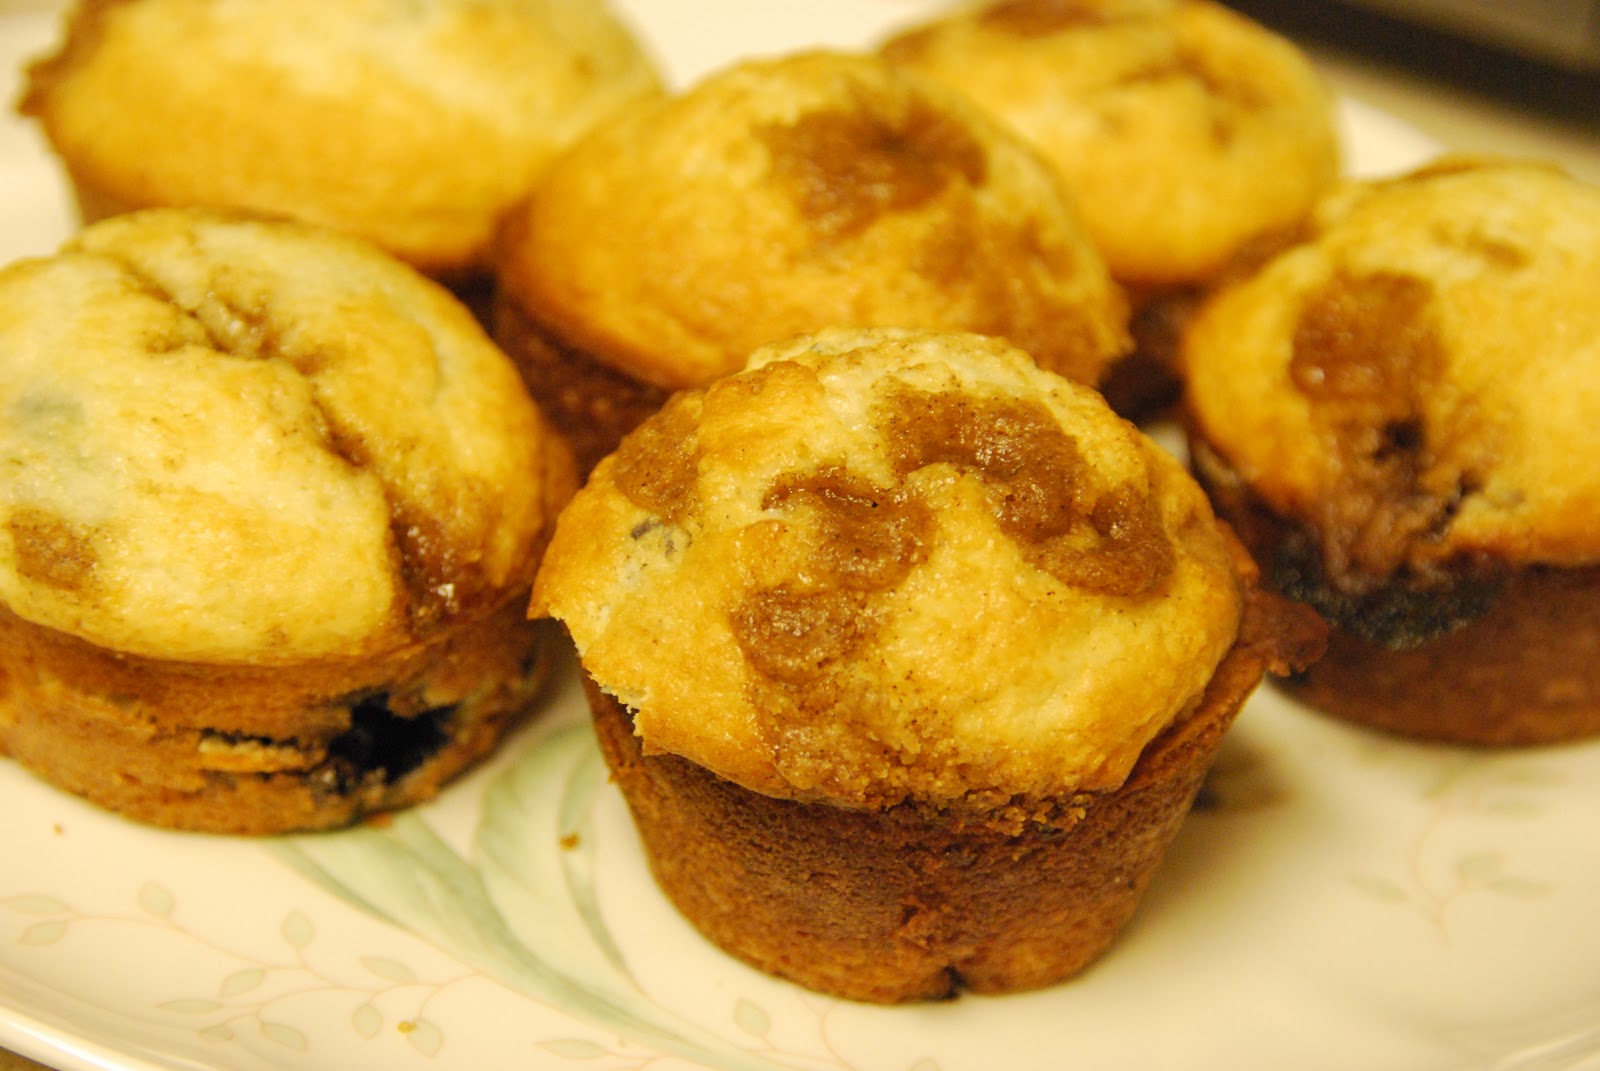
Blueberry Bombshell Monster Muffins

*Named by DH

Ingredients
1 1/2 C      flour
3/4    C      white sugar
1/2    tsp    salt
2       tsp    baking powder
1/3    C      vegetable oil
1                egg
1/3    C      milk
1       tsp     vanilla
1       C      blueberries

Topping: Mix together with fork
1/2     C     brown sugar
1/3     C     flour
1/4     C     butter
1 1/2  tsp   cinnamon

Get Cooking:

Preheat oven to 400 degrees. Grease muffin tins or use muffin liners

Mix flour, white sugar, salt and baking powder.

In a 1 cup liquid measuring cup, add 1/3 cup of vegetable oil; add the egg and then enough milk to fill the cup.
Gently mix this into the flour mixture.

Fold in blueberries.

Pour into muffin tins. Sprinkle with topping. Don't go overboard with topping or it will cause muffins to sink in the center.

Bake 20-25 minutes or until done.

We had this for dinner along with scrambled eggs and bacon. Yummmy!

Wednesday, September 21, 2011

Babies on the mind?

I wanted to share one more piece of random art I was working on. I had an old canvas with something ugly on it so I painted over it and created whatever my brush felt like doing. After I finished I started studying it more closely and realized the effects of having had a baby recently and having many friends who are pregnant must be getting to me. What do you think this looks like?


I am leaning towards sperm searching for eggs and think I will name it the "fertility painting." Hopefully guests won't feel too uncomfortable since it is hanging over the guest bed. Perhaps future company would just be better off not reading this post.

Chair Makeover

Of course since I changed up some things in the guestroom, I needed to update the chair that was my mother's since she was a little girl. Derek asked if that meant putting it in the basement. I really think it has potential to be cute and even if it doesn't get used much it will be nice for occasional extra seating if needed. Here's the before...


I believe that is even the original fabric. I bought some fabric on sale to replace this. It's actually black and white, not cream, as it looks in the photo.


I took the chair into the garage and spray painted it (yeah, the lazy but CHEAP way). I nearly killed off all my brain cells from doing this in an enclosed space. I recommend doing it outside or at least in a well ventilated space. I took it outside today to dry faster.


And here she is! I ran out of paint near the end so some spots are a little blotchy but it ended up adding to the artistic look of it and I rather like it.


  By the way, my inspirations for color in the room came from this clearanced art. Looks a little icky in this picture but it's really very pretty. The green and blue in this are the exact same colors are the chair and lamp.

Lamp Makeover

I am continually changing the decor in our home. I think I have it the way I want it... then see a photo in a magazine or online and decide that, no, that's the way I REALLY want it. My husband is thankful that at least I don't always buy something new. I usually just try to create something new out of something we already have. Sometimes it works- and sometimes it goes in the garage sale pile.

Some friends who are expecting a baby recently cleaned out their office. You know how that is. When a baby comes into the picture, suddenly there is no room for an office or guestroom. It's going to the baby. We did that when we found out we were expecting Logan. Our office in now in a living room closet, in the kitchen, and in the basement crawl space. Anyway, so while our friends were cleaning up for the baby, they passed on a nice IKEA filing cabinet that they could no longer use. I can't pass up anything free. I had no idea were I was going to put it but it looked so nice and I was sure that it could get used....even if it ended up being a new dog house for Jasmine.

Sweet hubby helped me rearrange furniture in our guestroom about a dozen times before I settled on moving the unsightly bookshelf into the guestroom closet (it actually works) and putting the cabinet in it's place. I currently think I will use it for out of season clothes.


Once moved the cabinet into the room I realized we were going to need a lamp. Off I go into the basement to see what I can scrounge up. I found an old lamp that my mother-in-law got us at a garage sale. I never used it but thought it had potential so I saved it. When I showed it to Derek, he sort of half laughed and grimaced at the thing and voted on something else. But I told him to wait till I spray painted it. I used a half full can of my favorite color of green (Krylon Ivy Leaf) which I also used to make a necklace for my sister. I need to have her model it for a picture. I  forgot to get a before shot of the lamp...but it was plastic black and fake gold before-here it is after.


I also decided to dress up the lampshade without spending any money. So I picked out a silhouette online, printed it and then cut it out. Using it as a guide. I first drew the design on the lamp in pencil.


After that I used a black sharpie to trace the pencil markings. Next I drew little squares for windows.


After that, I filled it all in.


Now the idea was that when the lamp was turned on you would see the silhouette of the city. Unfortunately, because the lampshade had two layers of fabric it was a little thick and made it harder to see. Still, I am fairly pleased with how it turned out. I think I might eventually had some ribbon to the outside as well and I have the idea of adding something to make it look like there are stars in the sky. I haven't figured that part out yet though. If I ever do more, I will post pictures.